New year new me? Lets start with some carbs. Who doesn’t love sourdough bread? We’ve been wanting to make sourdough since before we started this blog, we just wanted to make sure we did it properly. And boy, was it worth the wait!
To make sourdough you will need to begin with a sourdough starter which will need to be made at least a week in advance, or if you know anyone who has a starter, take some of theirs that they throw away when feeding! The older the starter, the better your bread will be.


We don’t have a sourdough starter which is 100’s of years old so we have had to start from scratch using an apple to begin the fermentation process. It sounds gross, we know.


- 1 medium apple, grated
- 500g strong white bread flour
- 400ml tepid water
- 250g strong white bread flour
- 200ml tepid water
- Mix together you apple, flour & water to create a runny dough, set aside in an airtight container (kilner jar is great for this) for 3 days.
- After 3 days your starter should have grown & you will need to do your first feed. Tip half the starter away and add 250g flour with 200ml water, leave again for 2 days.
- Repeat this feeding process and your starter should be ready to use.
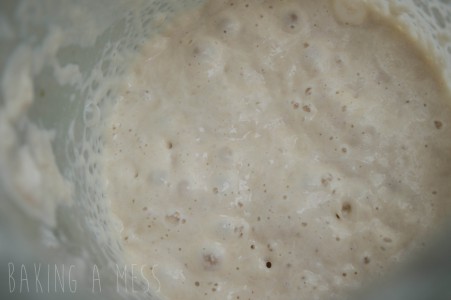
Making sourdough is a very, very, very, long and slow process, but totally worth it! Next step is to make the sourdough loaf, your starter should have been going for about a week now and it will be smelling rather pungent with a strong vinegar smell. You will also notice the the grated apple has disappeared from your starter and you’re left with a sloppy dough.
If you have been keeping an eye on your sourdough starter you will see that after feeding it gas bubbles are created and the mixture will begin to rise, this is why you need such a large jar / container for your starter. After rising it will drop, this is when the starter is most active. When making your bread you want to use the starter just as it is beginning to drop, at its most active point which will help your bread to rise.


- 300g sourdough starter
- 500g strong white bread flour
- 10g salt
- 10g brown sugar
- 250ml water
- In a stand mixer, using the dough hook mix together all the ingredients until the dough seems smooth.
- Tip the dough out onto your surface and finish the kneading process using your hands, this way you can feel when the dough is ready.
- Lightly oil a bowl, pop in the dough & cover with clingfilm. Leave to prove for at least 4-5 hours, until doubled in size.
- Tip your dough out onto your surface and ‘knock back’ the dough. Shape your dough into a ball and place into a tin or cane banneton which has been heavily floured or lined with a floured cloth or tea towel (it will stick to the bowl if you don’t do this step).
- Leave to prove again for a further 3-4 hours.
- Preheat your oven to 230C and put a baking tin with a little water in the bottom of your oven (this will create steam).
- Tip your dough out onto a baking tray and score the top of the loaf.
- Bake for 35-40mins, you can test its ready by tapping the bottom to see if it sounds hollow.
- Tip: you should know when your dough is ready after proving if it doesn’t spring back when you poke it
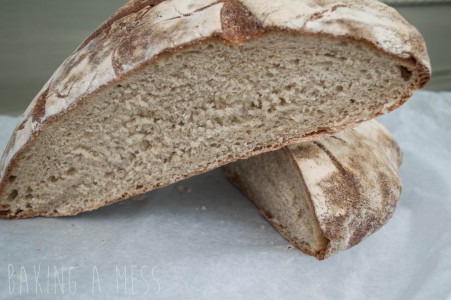
Wasn’t that bad was it? It may have taken what felt like a year and a day but you can taste the hard work – it is so much better than a regular loaf. The proving times are loooong but we find it’s easiest to leave your dough to prove overnight, just stick it in a cool place, or fridge (covered) and leave it, this way you aren’t watching a bowl of dough all morning constantly waiting to see when it’s ready for its second prove. Again for your second prove the key is the longer the better, this will help give you those lovely big air bubbles.
Sourdough is a rather lose dough and doesn’t hold its shape very well so it’s best to let it prove in a container, we used a 1 litre banneton to create ours which was lined with cloth – however, if you want to get those lines created on the bread just heavily flour the cane banneton. Carefully tip the dough out onto a floured tray, you do not want to knock out all of the air you just spent your whole life trying to create!!
Pâté is great with sourdough (it’s also great as toast with butter or even better, a grilled cheese sandwich, but…) it’s Christmas and pâté is perfect for this time of year! We decided to go for a chicken liver pâté with a touch of white wine, we also finished our pâté off using some membrillo, which is a quince paste we made. We just thought we’d make some quince jelly for Christmas and used a couple of quince to make this membrillo which goes perfectly with pâté or cheese!


